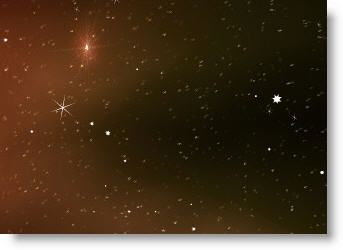
Flash CS4 Planetarium in 49 Lines

April 22, 2009

Intro

In Chapter 7 of the book I change the  Planetarium example (shown in a previous post) so that it only uses XML (threw out Cairngorm). And in the process I thought, hey this should be easy to do in CS4. And it was! Check it out below…a planetarium (with real star data) in 49 lines of code…including comments.

Flash CS4 Planetarium in 49 Lines

Flash CS4 Planetarium in 49 Lines

Demo

Source

Disucssion

There are two main steps in getting this to go:

Step 1: Get a star object into your library so you can instantiate it onto the stage like you would your particles class – this step saves you tons of code: var myStar = new Star();

Star in the Library for Instantiation

Star in the Library for Instantiation

Step 2: Treat your stars like a particle system. This lets your stuff then into an updatable array so you can rotate them:

The rest of this stuff you’ve seen before, and I go through the discussion in the book and in the YouTube video above so I just show the code below: myParticles[j]

Sample Star Data (CSV)

AND, 2.065, 42.316, 0,
AND, 1.161, 35.616, 1,
AND, 0.655, 30.85, 1,
AND, 0.139, 29.083, 1,

CS4 Planetarium in 49 lines

import flash.events.*;
import flash.display.*;

//Create star parameters
var myStar:Star;
var skyRadius:Number = 240;
var myOsc:int=0;
var starHolder:MovieClip= new MovieClip();

//Create a star array to hold CSVdata and particle array
var starArray:Array=new Array();
var myParticles = new Array();

//XML Statements used to bring in XML data
var urlRequest:URLRequest = new URLRequest(“data/starData.xml”);
var xmlLoader:URLLoader = new URLLoader(urlRequest);
xmlLoader.addEventListener(“complete”, readXml);

//XML parser and CSV splitter
function readXml(event:Event):void{
var markersXML:XML = new XML(event.target.data);
starArray=markersXML.myStars.split(“,”);

//Set the initial star system in place and add to a Movie holder
for(var i:uint = 0; i < starArray.length/4; i++){

//Instantiate stars and place them in a particle array
var myStar = new Star();
myParticles.push(myStar);
starHolder.addChild(myStar);

//Position stars (x, y, z) on stage
myStar.x=skyRadius*(Math.cos(2*Math.PI*starArray[4*i+1]/24)*Math.sin((90-starArray[4*i+2])*Math.PI/180));
myStar.z=-skyRadius*(Math.sin(2*Math.PI*starArray[4*i+1]/24)*Math.sin((90-starArray[4*i+2])*Math.PI/180));
myStar.y=skyRadius*Math.cos((90-starArray[4*i+2])*Math.PI/180);

//Scale stars according to magnitude and give a rand rotation
myStar.scaleX=myStar.scaleY=(1/9)*(3-starArray[(4*i+3)]);
myStar.rotation=180*Math.random();
}

//Add stars to star holder and position the holder
addChild(starHolder);
starHolder.x=400;
starHolder.y=300;

//Create your animation loop using an Enter Frame Listener
this.addEventListener(Event.ENTER_FRAME, onEnterFrame);
}

function onEnterFrame(event:Event):void{
//Increment oscillation parameter and iterate over stars
myOsc++;
for(var j:uint = 0; j < starArray.length/4; j++){

//Set new x, y, z for your stars as they rotate
myParticles[j].x=skyRadius*(Math.cos(2*Math.PI*starArray[4*j+1]/24+myOsc/180)*Math.sin((90-starArray[4*j+2])*Math.PI/180));
myParticles[j].z=-skyRadius*(Math.sin(2*Math.PI*starArray[4*j+1]/24+myOsc/180)*Math.sin((90-starArray[4*j+2])*Math.PI/180));
myParticles[j].y=skyRadius*Math.cos((90-starArray[4*j+2])*Math.PI/180);
}}


2 and 3D FLINT Particle (Gumbo) Viewers

April 17, 2009

Intro

I used to have an old truck, that I payed way too much for, and on its sixth repair trip … the mechanic said there had been too many hands in it. What did that mean? And then it just died and nobody knew why. It’s true for software as well – too many people working on a project can kill it … you just need a few bright folks. And with Flint, there was just one, Richard Lord. It demonstrates how powerful just one guy can be.

In chapter 6 of the book, we cover Richard’s incredible FLINT particle system and its use in PV3D … super job Richard Lord!!! This guy must have a cranium cavity the size of the grand canyon.

However, in the prep for the particle chapter I really got tired of having to wait for his different example apps to come up, so I created 2 and 3D fast particle viewers (in Flex 4 Gumbo) . You can view the apps below and download the source code as well. They work very similarly to the MD2 viewer posted earlier, so I won’t cover how they were made here.

Download Source for both Apps here

2D Viewer Demo (click this link or image below)

Flint 2D Particle System

Flint 2D Particle Viewer

3D Viewer Demo (click this link or image below)

3D Particle Viewer

Flint 3D Particle Viewer


Flash CS4 Exploding House of Cards (3D Particle Class)

April 15, 2009

Intro

Exploding an object is serious gaming fun. There’s just something about the human psyche that loves to see things blow up. In this post, we show you how to create a card house in Flash CS4 and then how to blow it up by treating the cards as particles.

Exploding House of Cards

Exploding House of Cards

Demo

Source: http://flex3cookbook3.googlecode.com/files/blowitUp3D.zip


YouTube Video 1: Building a House of Cards in CS4 (Part 1)

YouTube Video 2: Building a House of Cards in CS4 (Part 2)

YouTube Video 3: Making Your CS4 Card House Explode (Part 3)

Discussion

The first step in making things explode is to add a spin (x, y, z) property to your Particle3D class (developed in the book).

You can accomplish this in the following three steps:

Exploding an object is serious gaming fun. There’s just something about the human psyche that loves to see things blow up. The first step in making things explode is to add a spin (x, y, z) property to your Particle3D class. You can accomplish this in the following three steps:

Step 1: To keep things straight rename your Particle3D (developed in the book) class to ParticleBlowUp and add a spin (x, y, z) property

public var spinX:Number;
public var spinY:Number;
public var spinZ:Number;

Step 2: In the constructor function, set the spin (x, y, z) equal to zero.

spinX = 0;
spinY = 0;
spinZ = 0;

Step 3: And in your animation method “myLoop” update the rotation of the particle by iterating the spin (x, y, z) amount.

this.rotationX += spinX;
this.rotationY += spinY;
this.rotationZ += spinZ;

And that’s all you have to do to your Particle3D (now named ParticleBlowUp) class. See the book for more details…

You’re Only Half Way

But to get your particle system to explode you want to transfer a multi-part movie clip into your Particle class (using polymorphism). Then iterate over the elements of that movie clip, so you can spin those elements off into space in different directions, simulating an explosion.

To do this, make the following changes to your Particle3D class shown below:

1. Remove the “extends Sprite” statement from your ParticleBlowUp class; this allows you to bring in an object into your ParticleBlowUp class.

2. Create a public property “obj” and data type it as a Display Object:

public var obj:DisplayObject

3. Add “obj” to your constructor method, declare “obj” as an object in your constructor method.
4. Finally, change all the “this” keywords to object so that the transformations are applied to the object passed in through the constructor.

To see the rest of the discussion click the link below:

Read the rest of this entry »


Hacking Plugin Media and PV3D.org

April 11, 2009

Intro

Seb Lee-Delisle is the technical director at Plug-in media and is famous world wide for his particle effects and his very entertaining presentations. During the Christmas season Seb usually releases a snow particle system to the open source community. You can download Seb’s snow systems and more from his blog at www.sebleedelisle.com.

In this post, you’ll take Seb’s snow-storm particle effect and combine it with another great blog release found on John Lindquist’s site at www.pv3d.org. John also releases tons of great PV3D examples and you should take the time to visit his site as well.

You’ll combine Seb and John’s work to produce a reflecting snowy Christmas scene shown below. This is a great example of hacking two different software apps to produce a superior one.

IT'S A SNOWY CHRISTMAS

IT'S A SNOWY CHRISTMAS

Demo

Download

YouTube

Discussion

If you haven’t guessed it yet, hacking in the open source community is a good thing, and the book emphasizes going beyond the surface of PV3D and making it better (or hacking the heck out of it)!

Making it Snow for Christmas

You’ll want to start by either going to Seb and John’s blogs and downloading the corresponding snow storm and Flint Christmas scene, or by downloading the Merry Christmas code from the book’s chapter code (or link above).

John uses this Christmas scene as an example of Flint particles. The problem is that his snow is just 2D and does not interact with the reflective surface. Seb has 3D snow that will interact with the surface. So you’re going to delete the FLINT particle snow system (you’ll learn about FLINT in a later post) and add Seb’s snow.

Here are the steps:

1. Delete the Flint Particle system from John’s code.
2. And import Seb’s snow storm package into to John’s code and instantiate it using the following code:

snowStorm=new SnowStorm(100, .4,2000);
// Also, make sure that you update the snow in your animation loop (enterFrameHandler) or it willnot show up.
snowStorm.update();

3. John uses planes for Christmas ornaments, you can “snaz” this up a bit by replacing the planes with spheres, and by reducing the segments to 2×2 you make your ornaments look like crystals.

for(var i:int = 0; i < total; i++)
{
var material:ColorMaterial;
if((i & 1) == 0) material = new ColorMaterial(0xaa0000);
else material = new ColorMaterial(0x00aa00);
material.doubleSided = true;
//Add a sphere instead
var sphere:Sphere = new Sphere(material, 10, 2,2);
sphere.x = Math.cos(i) * (radius – i * 3);
sphere.z = Math.sin(i) * (radius – i * 3);
sphere.y = i / total * height;

myHolder.addChild(sphere);

}

4. You now have 3D snow and cool looking ornaments, but the snow is out of wrack and at this point you’ll need to adjust a few parameters to make it look just right. In this case, we want the falling snow to disappear just as it touches the reflective surface . To accomplish this adjust the following parameters

snowStorm=new SnowStorm(100, .4,2000);
myHolder.addChild(snowStorm);
//Pull the snow up so it disappears when it hits the reflective surface
snowStorm.y=1000;

In addition to changing your particle parameters you raise your snow’s y-position so it just touches the reflective surface before being recycled. Next you have to go into the snow class itself and adjust the particle ratio. In the SnowStorm class in the update method make the following change:

if(particles.length/10 < maxFlakes)

This is what I call emotional (or intuitive) programming. You might not know completely how the code works but by changing a few parameters you bring everything into agreement. This can be both dangerous and fun! So make sure you keep back up copies in case you really mess something up.

This causes your particles to be regenerated more rapidly and close the gap that appears due to particle lag. Now matter what you create, you’ll always need to make adjustments. Get used to going down to sub classes and changing parameters.

Flex is a great tool for surfing logically to classes that you need to modify. Just roll over a method and hold down the command key (MAC) or alt key (PC) and when you do the method, class, or property will underscore and when you click on it you will automatically navigate to that method even if it is in another class.

5. Finally you want to change the words from MERRY CHRISTMAS to IT’S A SNOWY CHRISTMAS. You’ll need to play around with the spacing of the words a little to get it right (this is where a little knowledge of trig is helpful).

//IT’S A
var itsaMaterial:Letter3DMaterial = new Letter3DMaterial(0x00cc00);
var itsa:Text3D = new Text3D(“IT’S A”, rockwell, itsaMaterial);
//SNOWY
var snowyMaterial:Letter3DMaterial = new Letter3DMaterial(0xcc0000);
var snowy:Text3D = new Text3D(“SNOWY”, rockwell, snowyMaterial);
//CHRISTMAS
var christmasMaterial:Letter3DMaterial = new Letter3DMaterial(0x00cc00);
var christmas:Text3D = new Text3D(“CHRISTMAS”, rockwell, christmasMaterial);

The final results are shown below in the figure above. To see the entire code download it from the source or click the more button below:

Read the rest of this entry »


3D Lines in CS4 using drawPath

February 19, 2009

Intro

In the previous post on Pendulums, Papervision’s line3D class was used to plot the orbit of a Foucault Pendulum in a rotated plane. But there was a problem – adding more line segments slowed the processor and as result line segments had to be removed. Aha! You just thought I had created some really cool effect by erasing the end of my line while making the front. No, without erasing, everything would eventually slow down to a stand still.

Let’s speed things up a little by using CS4’s drawPath method. Click on the image below to see the demo.

3D Lines in CS4

3D Lines in CS4

Source

Demo

YouTube


Discussion: Drawing Points and Lines

Keith Peters in his book does a similar example using CS3 line functions, but he doesn’t sort his filled circles. His circles are black, and when you run his demo it appears as if the application is z-sorting-but it isn’t. If you try to applying his zSort algorithm the connecting lines go hay-wire. They don’t know where to go and try to follow his black circles as they rapidly sort.

Here’s the Trick

Commonly when we run into such issues in Papervision3D we create dummy graphics for our wayward objects to follow. So in this case you create dummy graphics under your circles for your lines to follow. Thus, separating the zSortng of the circles from the positions of your lines.

There ‘s a little bit of double processing here, but it’s worth it. And it’s very typical of solving problems of this type. In the code below, you see the parallel creation of the circle (or ball) and the dummy marker (or mark).

var ball:BallCS4 = new BallCS4(10, 0);
var mark:MarkCS4 = new MarkCS4(0, 0);
marks.push(ball);
balls.push(ball);
mark.xpos = ball.xpos = Math.random() * 200 – 100;
mark.ypos = ball.ypos = Math.random() * 200 – 100;
mark.zpos = ball.zpos = Math.random() * 200 – 100;
myHolder.addChild(ball);
myHolder.addChild(mark);

The MarkCS4 class is your dummy marker and is an object of zero pixel size – how do like that one! The BallCS4 class is similar to the MarkCS4 class. But draws a circle instead of a zero pixel line.

BallCS4 uses the drawPath method to create its circle in CS4. Since there are no drawCircles methods in CS4 you have to create one. I used four radial curves (created by the CURVE_TO method), which looks fine for small circles, but you’ll need to add eight for larger circles. The radius parameter (below) determines the size of your filled circle.

commands.push(GraphicsPathCommand.MOVE_TO);
data.push(-radius/1.9, radius/1.9);

data.push(0, radius);
data.push(radius/1.9, radius/1.9);

data.push(radius, 0);
data.push(radius/1.9, -radius/1.9);

data.push(0, -radius);
data.push(-radius/1.9, -radius/1.9);

data.push(-radius, 0);
data.push(-radius/1.9, radius/1.9);

commands.push(GraphicsPathCommand.CURVE_TO);

graphics.lineStyle(0);
graphics.beginFill(0x800000);
graphics.drawPath(commands, data);

Extra Reading

A great article which explains this in more detail can be found on Senocular’s blog. Once you’ve got your “commands” and “data” Vectors loaded, you throw them into the drawPath function…and TaDah – sphere (or in this case filled circle)! Instantiate it as many times as you want.

zSort

Now that you’ve decoupled the spheres from the lines using the marker graphics you can now use Keith’s zSort method.

private function sortZ():void
{
balls.sortOn(“zpos”, Array.NUMERIC | Array.DESCENDING );
for(var i:uint = 0; i < numBalls; i++)
{
var ball:BallCS4 = balls[i];
myHolder.addChild(ball as Sprite);
}
}

The Big Limitation

The big limitation is that drawPath only draws in x and y – hey where’s the z Adobe? So to get around that limitation you have to use perspective scaling given in the code below:

var scale:Number = fl / (fl + ball.zpos);
ball.scaleX = ball.scaleY = scale;
ball.x = ball.xpos*scale;
ball.y = ball.ypos*scale;

That’s it, you’re ready to start using 3D lines in CS4. In an upcoming post, we will treat Creating 3D Springs and Making a Node Garden. And my favorite, 3D spring data visualization which I can’t wait to release. I’ve been working on this one for a while.

To see the entire code download the source above or click on the more button below.

Read the rest of this entry »


CS4 Creating a Parametric Particle Field

January 11, 2009

Intro

In the previous section of the book, you learned how to get a single element orbiting a torus using the parametric equations of a torus. Here you’ll multiply that single element by 100 and create a parametric particle system, which orbits your torus. Click the image below to see the torus worm in action.

Torus Worm (Parametric Particle System)

Torus Worm (Parametric Particle System)

You’ll get a more formal treatment of particles in the gaming section of the book. But for the most part, anything with more than one element can be treated as a particle system. Treating elements as particles has a number of advantages. Primarily, particles are more easily handled mathematically. You’ll use particle systems extensively throughout the book.

Web Stuff

1. Demo
2. Source

3. YouTube (Below)

Coming Soon!

Discussion

Building a particle system in Flash is relatively easy. And in this section, you’ll cover the basics. To build the orbiting worm around a torus (parametric particle system), follow the steps below:

1. Declare the number of particles to be created and create an array to place your particles in. This is the key to working with particles. Using an array (particles_ary) you’ll be able to control position, color, and alpha of each particle.

var numOfParticles:uint = 100;
var particles_ary:Array = [];

2. Use a for loop to run the updateStage() function which creates your particles. Once the particles are created run the addEventListener method which starts the updating loop for each particle on every on enter frame event.

for(var i:uint = 0; i < numOfParticles; i++)
{
updateStage();
numVar++;
//Start Looping
if(numVar==numOfParticles){
addEventListener(Event.ENTER_FRAME, myonEnterFrame);}
}

3. Draw your balls (particles) to the stage and place them in a particle array. A random color is assigned to each ball using the Math.random()*0xffffff method.

//Draw a Ball
var ball:Sprite = new Sprite
//Assign a random ball color
ball.graphics.beginFill(Math.random()*0xffffff);
//draws your ball at 0,0
ball.graphics.drawCircle(0, 0, ballRadius);
ball.graphics.endFill();//ends the fill
//Add ball to the stage
addChild(ball);
//Push the ball into a particle array
particles_ary.push(ball);

4. With each onEnterFrame loop update all your particle positions using myAngle+i/20 that separates the different particles in angle by the ratio of i/20. This causes your particles to line up on the torus and move across its surface as the myAngle variable is iterated. Use the particles_ary[i].alpha method to change the alpha of each particle based on their ith position. Center the particle system on the stage by adding CenterX, and CenterY to the particle x, y positions.

for(var i:uint = 0; i < particles_ary.length; i++)
{
//ball parametric orbit x
var newAngle:Number=myAngle+i/20;
particles_ary[i].alpha=1/(i+1)+.2;
particles_ary[i].x = (100+60*Math.cos(2*newAngle))*Math.cos(newAngle/4)+CenterX;
//ball parametric orbit y
particles_ary[i].y = (100+60*Math.cos(2*newAngle))*Math.sin(newAngle/4)+CenterY;
//ball parametric orbit z
particles_ary[i].z = 60*Math.sin(2*newAngle);
}

The result is a worm-like entity orbiting a torus. The key to creating particle systems and controlling them is to stuff the individual particles into an array upon creation. And then iterate over each particle during the frame loop of the animation sequence.

The master of building particle systems in Papervision3D is Seb Lee-Delisle: with numerous examples of Flash 9 particles systems on his blog at http://www.sebleedelisle.com. In addition, flint-particle-system, a very robust Google Code project, works very well with Papervision3D.

Although in CS4, with native 3D and pixel bender, the process of building particle systems becomes greatly simplified as shown in the code above.

Click the more button to see the entire code:

Read the rest of this entry »


Real Orbiting 3D Particles (Taking Out the Trash)

November 21, 2008

Intro

As opposed to using billboarding, this program illustrates real 3D orbiting particles. The particles shown below are recycled after a randomly generated lifetime and the size of each particle is proportional to its mass. Each time a particle is generated it is given a new randomly generated lifetime, position (within an emitter window) and velocity. And the Euler gravitational equations are immediately applied as each particle enters onto the stage. Click on the image below to see a demonstration.

Orbiting 3D Particles

Orbiting 3D Particles

Demo: http://www.professionalpapervision.com/demos/web/real3dparticles/

Download: http://code.google.com/p/flex3cookbook2/downloads/list

Discussion

When handling particle creation and annihilation you’ve got to remove extinguished particles or they will weigh down your computer memory and slow your CPU performance. When working with the Flash player the best way to do this is through recycling. That way you don’t have to worry about extinguishing particles.

But if you don’t or can’t recycle, you should know the following about how the Flash player handles its trash.

Handling Your Particle Trash (You better know this)

Once a particle is extinguished it will hang around in your computer’s memory and need to be removed. The removal process is often referred to as trash collection. And this occurs when the Flash player removes unused objects. There are three things that you must do in order for an object to be eligible for trash collection.

· It must be removed from all arrays

· It must be removed from the stage and all display objects

· It can’t have reference to it such as event listeners and any event listeners that are attaché to it must be removed.

Unfortunately once you do all these things it doesn’t mean your trash is going to be collected. You have only made it available for trash collection. In typical Papervision applications you do not have control over trash collection.

The way trash collection works is that as memory usage get to a certain point Flash performs a mark and sweep operation. The Flash player scans your application looking for elements eligible for trash collection and then sweeps them away. So performing the three tasks above doesn’t mean that the item will be immediately removed from your computer’s memory. Trash collection is sporadic with no guarantees as to when it is going to happen. But it will eventually happen so make sure you keep your unused particles ready to go out with the rest of the garbage. Below are a few code snippets to help your out.

1. Use the shift command to remove a particle from the particles array

myParticle = particles.shift();

2. Use the removeChild command to remove a particle from the stage

stageContainer.removeChild(myParticle);

3. Use null to make sure that all references are removed from your particle

myParticle = null;

Use the commands above to make your unused particles available for trash collection. If you don’t want to worry about collecting your unused particles reinitialize as shown in the earlier code example. But Papervsion is like a big particle system and you’ll eventually need to use the code above. Especially when throttling your 3D objects with a timer. More on that later.

The creation of particles systems are treated in detail in the book, but please download the code and play around with it. Also, to see the code click the more button below;

Read the rest of this entry »


Making Billboard Images in 3DSMax (Videos)

November 4, 2008

Intro

Being a good Papervision programmer is not enough. You need to also become a good graphic designer. In this two part video series, you’ll learn how to make great looking particles for your web projects.

In Part 1 you’ll learn how to make your particle image in 3DSMax, and in Part 2 you’ll learn how to photo process your image and put it into Flash.

Part 1 (Using 3DS Max to make great images)

Part 2 (Photo processing your image and putting it into Flash)

Intructions

To see the instructions for 3DSMax and learn more about mipmapping click the more button below.

Read the rest of this entry »


TriLogic Particle Billboarding (Flash Source)

November 2, 2008

Intro

If you are tired of the boring 0’s and 1’s of boolean logic, trilogic is here – 0, 1, and 2. In the 70’s we were sure that by combining enough NOR and NAND gates eventually our cyber machines would achieve consciousness. The problem was that our yes-no machines could not say (think) maybe – it was 0 or 1. But with trilogic you get a third parameter which allows for energy transfer/activation – or a maybe state.

  • zero – no
  • one – maybe
  • two – yes

The Particle Billboarding code uses trilogic to decide when an animation transfers its moving particles. It’s the simplest example I’ve ever seen of trilogic and could act as a stepping stone for understanding this new approach to computing.

Trilogic used to transfer animation to different states.

Trilogic used to transfer animation to different states.

The simulation starts with a random distribution and changes to a sphere, disc, torus, ellipsoid, and then loops back to the sphere. But as you roll over the different particles they are energized into orbit. Transferring this energy to the next object uses trilogic. This is the maybe part, dealing with energy distributions is a “maybe term” depending on activation levels. Yes – think of it as a neural net!

The code is simple enough,

if( makingTransition==0){
makingTransition=1;
for(var i:int=0; i<particles.length; i++){
//p.extra[“spin”] = 0;
var myX:Number=p.param*Math.cos(p.theta*Math.PI/180);
var myY:Number=p.param*Math.sin(p.theta*Math.PI/180);
var myZ:Number=0;

Tweener.addTween(p, {x:myX, y:myY, z:myZ, time:.5, transition:”easeInOutExpo”, onComplete:setTransNum});

}}
if(makingTransition==2){

p.x=p.param*Math.cos(p.theta*Math.PI/180);
p.y=p.param*Math.sin(p.theta*Math.PI/180);
p.z=0;}

From the code if

makingTransition==0: Stops particle energy friction of present object

makingTransition==1: Transfers particle energy to next object

makingTransition==2: Starts particle energy friction of next object

Check out the code, demo, and development video below.

Web Stuff

Demo: http://www.professionalpapervision.com/demos/web/billboarding/

Download (choose billboarding): http://code.google.com/p/flex3cookbook1/downloads/list

YouTube Video: How it was created.

More Stuff

The code is explained in detail in the book, but I am including it here. It’s not documented, but I will take care of that before the book is released. Click more below to see the entire code (or just download the source from the link provided above).

Read the rest of this entry »


Putting Stars and More into a Skybox (Source)

October 20, 2008

Introduction

A skybox is a simple device. Just a large low polygon cube that you put six panoramic images on-one for each side of the cube. Putting particles in the sky box adds a new dimension of fun and interactivity. But Papervision’s ParticleMaterial class only has two particles-a circle and square. So I added some of my own;

Stars – bursts – wedges – gears – polys

Stars and More!

Stars and More!

Below is a video on how I created this, demo site, source code download, background on its creation and source code swicth case that I added to Papervision’s ParticleMaterial class.

VIdeo Demo Code

YouTube:

Demo:

http://www.professionalpapervision.com/demos/web/skyboxstars/

Source: (SkyBoxandStars)

http://code.google.com/p/flex3cookbook1/downloads/list

Background

Recently, Seb Lee-Delisle did a skybox example in his presentation on Papervision3D Simplified-great presentation!

I downloaded his source code for the skybox and it didn’t work (probably because I was using a newer version of Papervision). So I rewrote it and added a few new features;

1. The planets now return when the cube gets too far out.

2. I added to the particle class. It now includes more than just square and circle particles. It has,

Stars – bursts – wedges – gears – polys

3. I got rid of the else if statements and added a switch case.

4. And I added multiple type planets to the skybox – starts – circles – burst. You can add more if you want.

You can catch Seb’s video and source code from his blog at

http://www.sebleedelisle.com/?p=263

I also encourage you to donate to Seb’s cancer run if you use his (or this post) material. I did!

http://www.sebleedelisle.com/?p=274

In my download, I included all the source code even the Papervision classes needed for the project to run.

Read the rest of this entry »